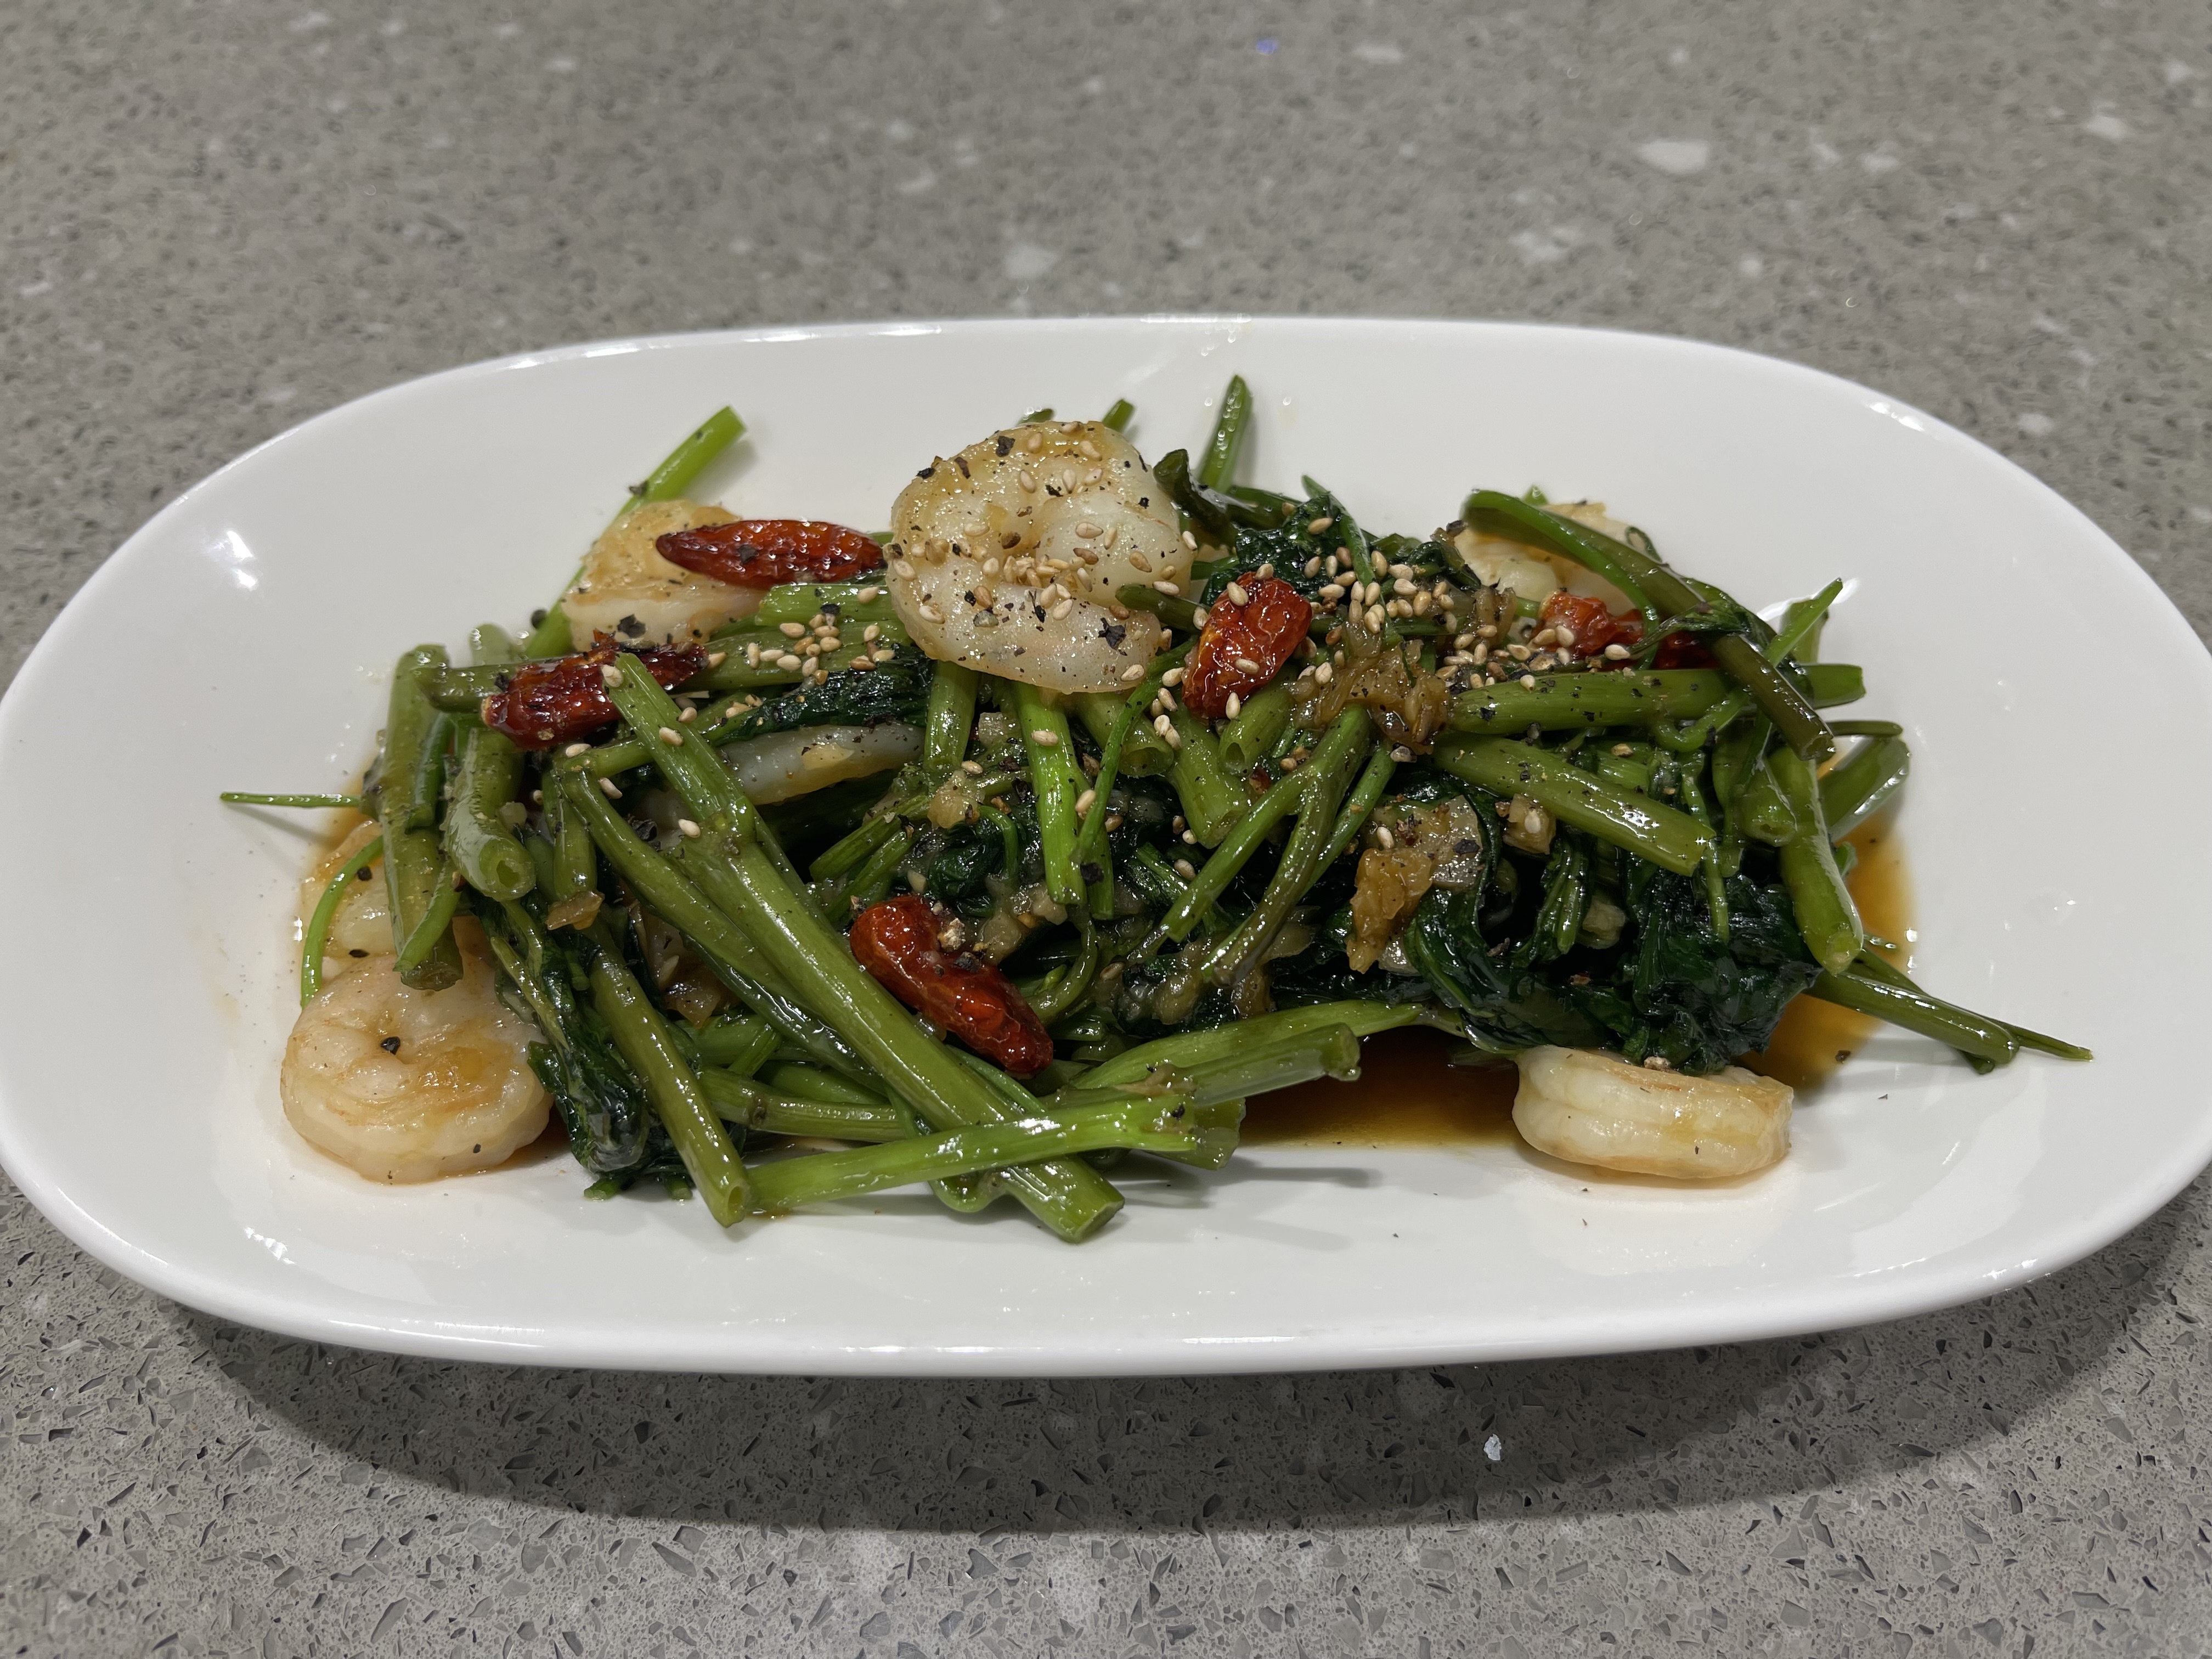
동남아 여행에서 한 번쯤 먹어봤을 공심채 볶음, 이젠 집에서도 간단하게 만들 수 있어요!
공심채는 영어로는 모닝글로리(Morning Glory)*라고도 불리는 채소로, 아삭한 식감과 특유의 향 덕분에 입맛을 돋우는 최고의 반찬이에요!!
오늘은 새우를 넣고 만든 감칠맛 가득한 공심채 볶음 레시피를 소개할게요.
해물 대신 동죽조개나 홍합,모시조개 등 조개류를 넣어도 정말 맛있어요! :)

🥬 재료 준비 (2인분 기준)
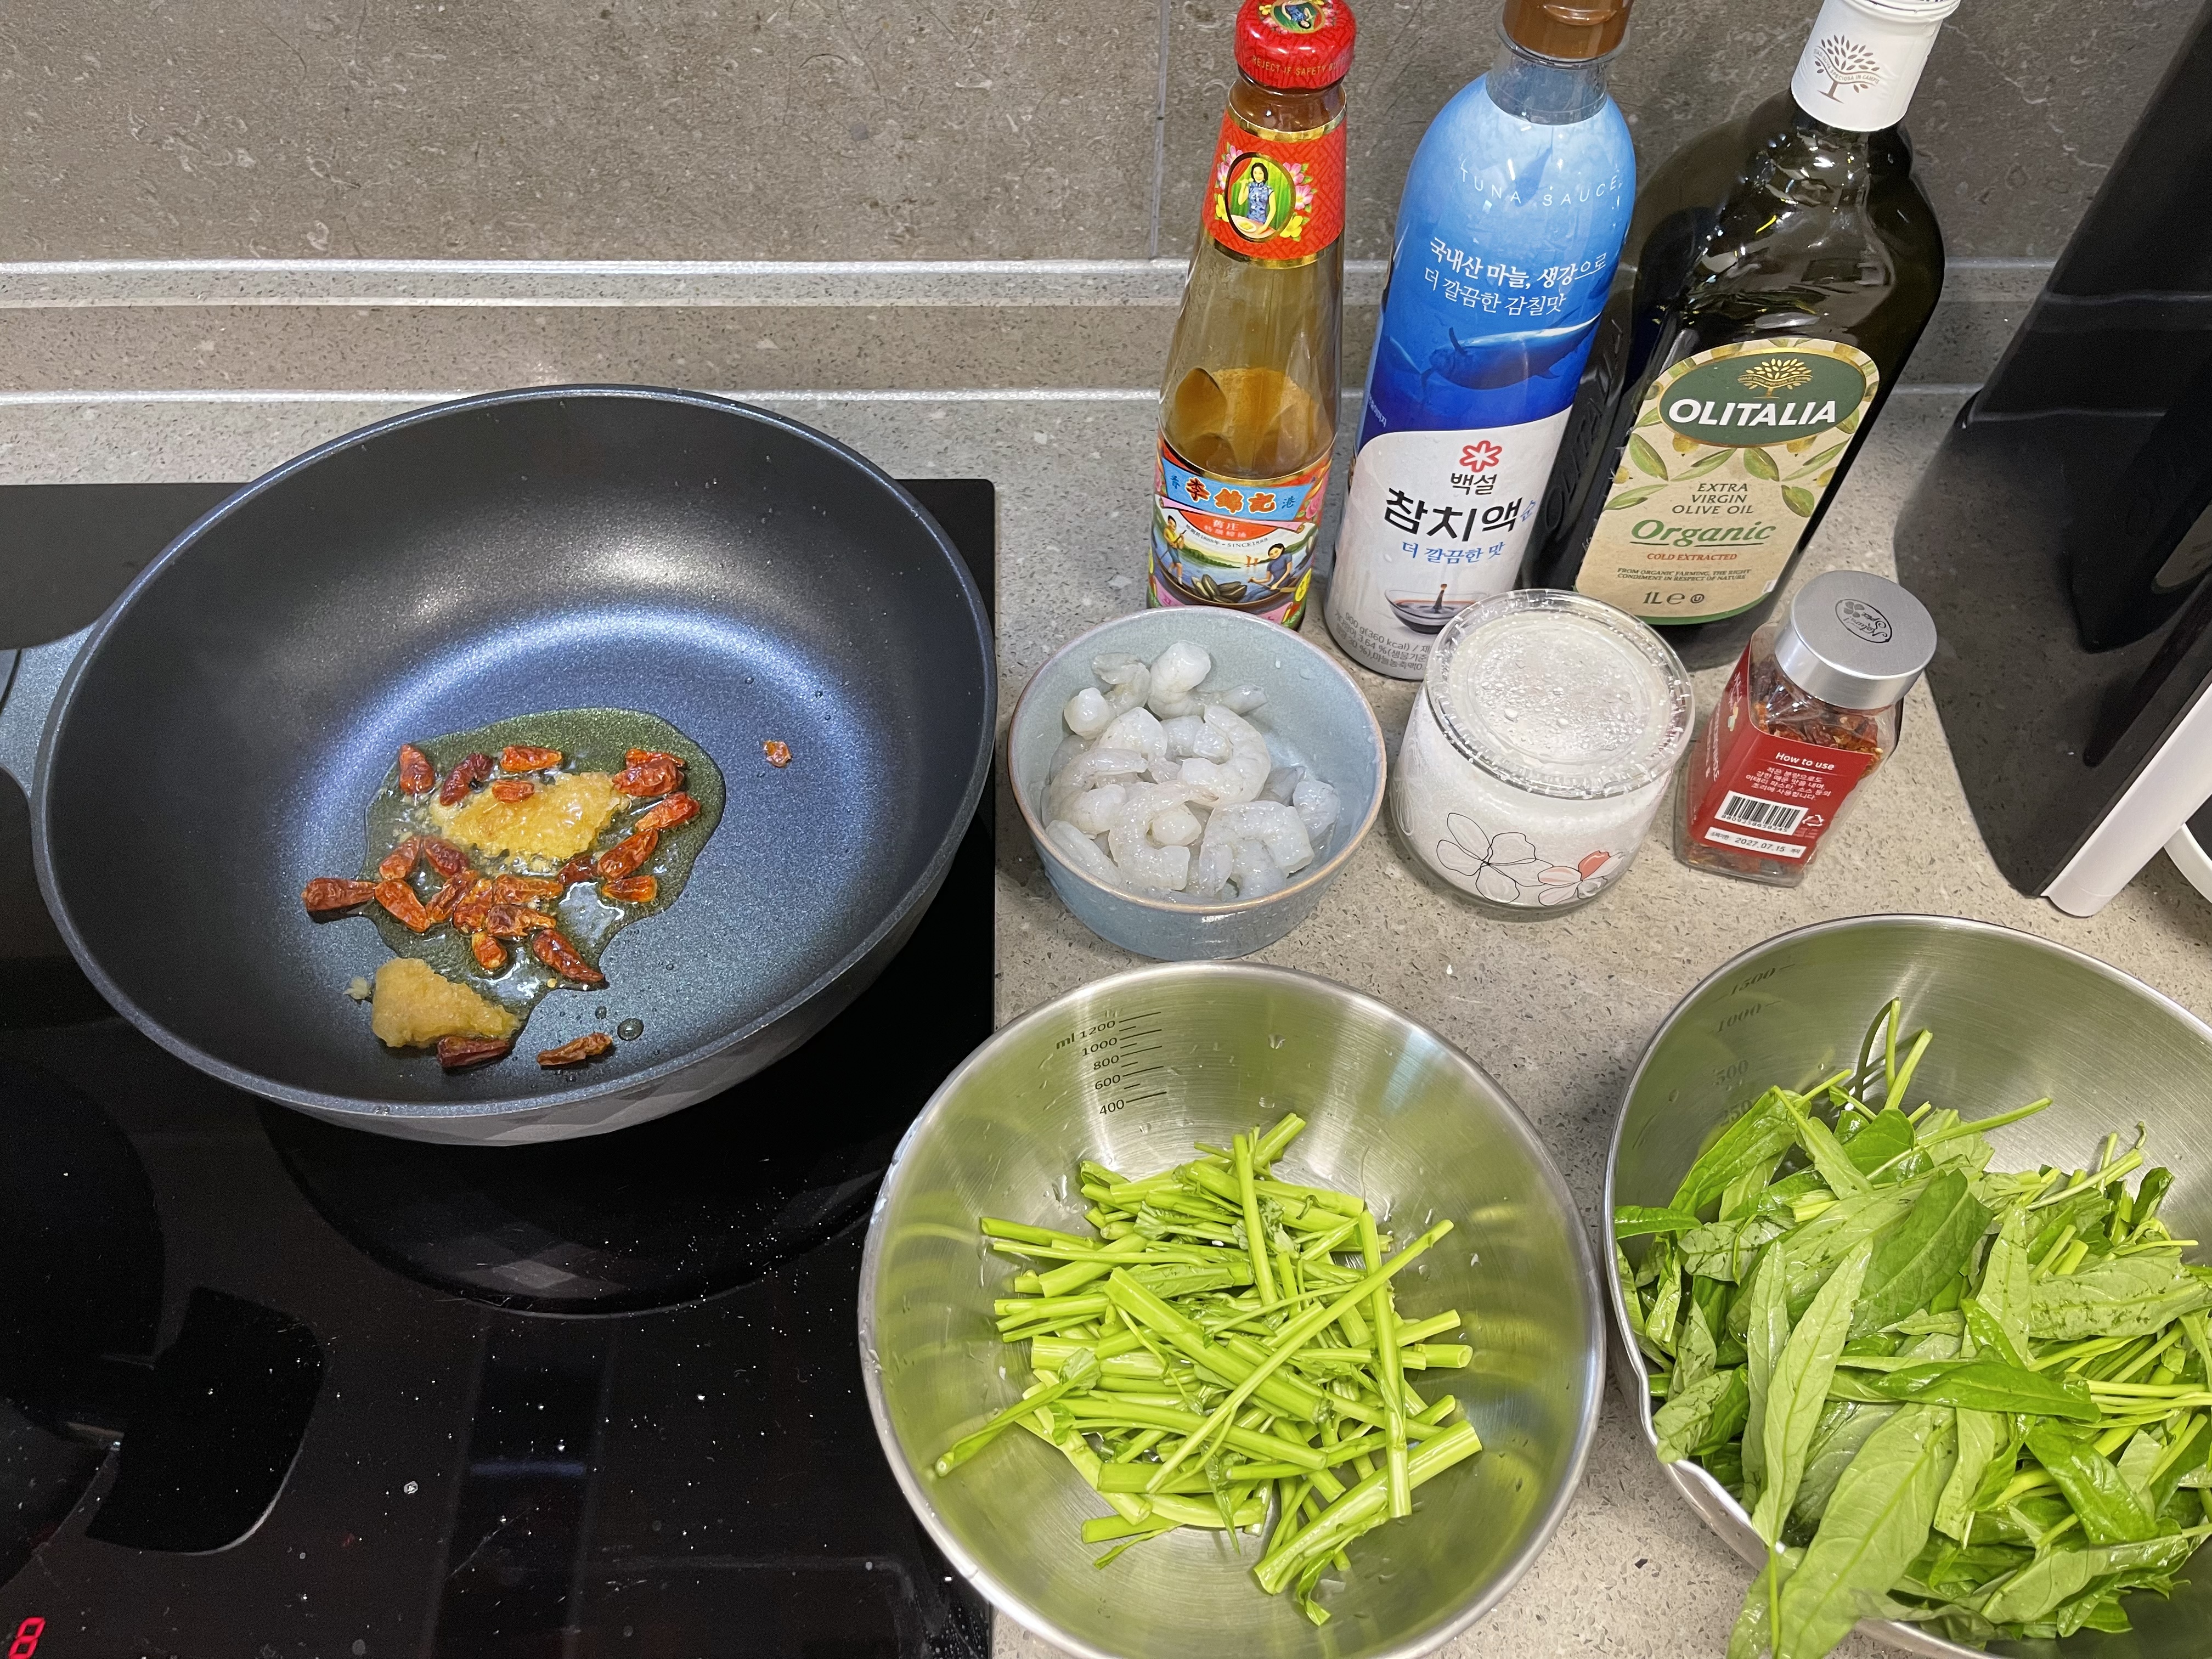
- 공심채(모닝글로리) 150g
- 새우 12마리 (껍질 벗기고 손질)
- 마늘 반 숟가락
- 페퍼론치노 적당량
- 굴소스 1숟가락
- 참치액젓 1숟가락
- 설탕 1숟가락
- 올리브오일 3숟가락
- 통깨(선택) 약간
👩🏻🍳 만드는 순서
- 팬에 올리브오일, 마늘, 페퍼론치노 넣기
예열된 팬에 올리브오일 3숟가락을 두르고 다진 마늘과 페퍼론치노를 넣어 볶아주세요.
(매콤하게 즐기시려면 페퍼론치노를 다져서 넣으면 매콤한 향이 더 올라와요!)
마늘 향이 올라오면서 노릇노릇해지면 준비 완료! - 새우 넣고 볶기
손질한 새우를 팬에 넣고 살짝 볶아줍니다. 너무 오래 익히면 질겨지니 살짝만! - 양념 투하!
새우가 어느 정도 익으면 굴소스 1숟가락, 참치액젓 1숟가락, 설탕 1숟가락을 넣고 골고루 섞어줍니다. (정말 간단하죠?)
이 조합은 태국식 볶음의 핵심 포인트예요. 짭짤하면서도 달큰한 맛이 어우러져 깊은 풍미를 더해줍니다. - 공심채 줄기 먼저!
공심채는 줄기와 잎이 익는 시간이 다르기 때문에 순서가 중요해요.
먼저 단단한 줄기 부분부터 넣고 센 불에 빠르게 볶아줍니다. - 잎사귀 투입 후 마무리
줄기가 어느 정도 익으면 남은 잎사귀를 넣고 숨이 죽을 때까지 한 번 더 볶아줍니다.
너무 오래 볶지 말고, 살짝 숨만 죽여야 아삭한 식감이 살아나요. - 플레이팅 & 토핑
완성된 공심채 볶음을 접시에 담고, 원하시면 통깨나 후추를 살짝 뿌려 마무리하면 완성!
보기만 해도 군침 도는 한 접시가 완성됩니다.
💡 팁 & 응용
- 새우 대신 홍합, 동죽등 다양한 조개류로 활용 가능!
- 매운맛을 더 원하신다면 페퍼론치노 대신 청양고추를 썰어 넣어도 좋아요.
- 밥반찬으로도, 술안주로도 찰떡궁합! 태국 현지 느낌 물씬 나는 요리를 집에서 즐겨보세요^^

향긋한 마늘향과 짭조름한 양념이 어우러진 공심채 볶음은 정말 누구나 좋아할 맛이에요.
특별한 재료 없이도 집에 있는 재료로 쉽게 만들 수 있으니 꼭 한 번 도전해보세요!
🍽️ Stir-Fried Morning Glory with Shrimp – A Taste of Thailand at Home!
If you've traveled to Southeast Asia, you've probably tried stir-fried morning glory at least once.
Now you can recreate that same vibrant flavor at home with just a few simple ingredients!
Also known as water spinach or morning glory, this leafy vegetable is loved for its crisp texture and fragrant taste. It’s the perfect dish to awaken your appetite.
Today, I’m sharing a savory and flavorful recipe featuring shrimp. But feel free to substitute with clams like manila clams, mussels, or even cockles — they work just as well! :)
🥬 Ingredients (Serves 2)
- 150g morning glory (water spinach)
- 12 shrimp (peeled and cleaned)
- ½ tbsp minced garlic
- A handful of pepperoncino (dried chili)
- 1 tbsp oyster sauce
- 1 tbsp tuna fish sauce (or regular fish sauce)
- 1 tbsp sugar
- 3 tbsp olive oil
- A pinch of toasted sesame seeds (optional)
👩🏻🍳 Instructions
1. Start with oil, garlic & chili
Heat a pan with 3 tbsp of olive oil. Add the minced garlic and pepperoncino and stir-fry.
(For an extra spicy kick, chop the pepperoncino before adding — it releases more heat and aroma!)
Once the garlic starts turning golden and fragrant, you’re ready for the next step.
2. Add shrimp
Toss in the shrimp and cook lightly. Don’t overcook them — just until they start turning pink and firm.
3. Add the sauce mix
Now add 1 tbsp oyster sauce, 1 tbsp tuna fish sauce, and 1 tbsp sugar.
Mix it all together and let it simmer for a bit.
This sweet-salty combo is the secret to that authentic Thai street food flavor!
4. Stir-fry the stems first
Morning glory stems are thicker than the leaves, so they need more time to cook.
Add the chopped stems first and stir-fry over high heat.
5. Add the leafy tops
Once the stems are softened, throw in the leafy parts and cook just until they wilt.
Be careful not to overcook — the goal is to preserve that crisp texture!
6. Plate & finish
Transfer to a plate, sprinkle some sesame seeds or black pepper on top, and serve hot.
Just looking at it will make your mouth water!
💡 Tips & Variations
- Swap the shrimp with mussels, manila clams, or any shellfish you like.
- Want more heat? Use fresh chili peppers like Thai chili or Korean Cheongyang chili instead of dried ones.
- This dish goes great as a side for rice or even as a light appetizer with drinks.
With its aromatic garlic base, savory sauce, and crunchy greens, stir-fried morning glory is a dish anyone can fall in love with.
It’s simple, fast, and made with ingredients you likely already have at home.
Give it a try — your taste buds will thank you! 😊
'[맘레시피] 나의 엄마' 카테고리의 다른 글
| ❄️ 아삭하고 새콤한 맛! 여름 입맛 살리는 오이탕탕이 (1) | 2025.04.30 |
|---|---|
| 🌧️ 봄비 오는 날, 바삭한 해물파전 어때요? 🦐🍻 (0) | 2025.04.24 |
| 🍄 향긋한 느타리버섯볶음 레시피 (2) | 2025.04.24 |
| 💥얼큰한 무국 (육개장) 레시피💥 (0) | 2025.04.23 |
| 엄마밥상 – 고추장찌개, 마음까지 따뜻해지는 맛 (0) | 2025.03.27 |


